Thursday, September 28, 2023

Use of Perspective

 For this project, I created an illustration exploring the use of one-point-perspective. The theme is transportation. I chose to illustrate a light cycle from the movie Tron: Legacy.

Process

Here is the reference board I created for this project:


All images were found on Google Images.

First, I gathered assets from SketchFab to kitbash a scene within Maya. I used the default Manny character rig to pose on the cycle.

These models were not made by me. Each one can be found at the links below:


I created a camera object to determine the angle of my image.


I rendered the scene and then imported the image into Photoshop.


I drew over the image to create lineart.


Finally, I filled in my image with color and added lighting details.


Monday, September 25, 2023

Simple Crate and Barrel

 For this project, I created a high-resolution crate model. 

Process

For reference, I followed these tutorial videos made by Nick Zuccarello. 

First, I created a proxy model and scaled it in relation to the default player character Manny from the Unreal Engine.


Then I imported my proxy crate into Unreal and set my scene.

I returned to Maya and built a new, higher-resolution crate based from the proxy. The lid of this crate can be opened!

Finally, I exported the new crate as an .fbx file. Moving into Unreal again, I right clicked my proxy mesh and selected "reimport with new file." This replaced my proxy crates set in-scene with the higher resolution version. I added separate exported meshes of the individual box and lid as well to better decorate the scene.


Thursday, September 21, 2023

Use of Basic Lighting

 For this project, I worked from Brian Rushing's Value and Contrast assignment. This is a drawing of the character Samus.


Monday, September 18, 2023

ZBrush Hammer Project

 For this project, I sculpted a magic hammer in ZBrush.


Process

First, I collected my references. The first hammer, made by Cosmin Alexandru Radu, was my reference for the basic shape of the sculpt. The second hammer, created by Alex Coman, was my inspiration for the secondary shapes.


I began with a simple blockout.


Then I blocked out the details.


I cleaned up the secondary shapes.


Finally, I added tertiary details, and rendered three perspectives!


Thursday, September 14, 2023

Use of Values and Contrast

 For this assignment, I explored the use of values and contrast to draw the eye in to different character designs. I worked off of three silhouettes. 

1 - Link (Silhouette by Willow Rachels)

2 - Samus (Silhouette by Eric Wiley)

3 - Ness (Silhouette by Tristan Spear)

Process

Here are the silhouettes from which I worked:


Monday, September 11, 2023

ZBrush Simple Head Project

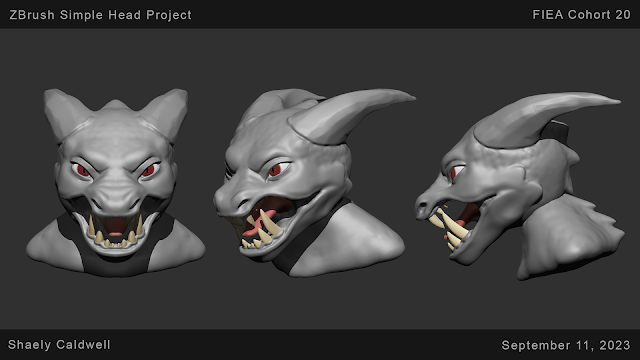
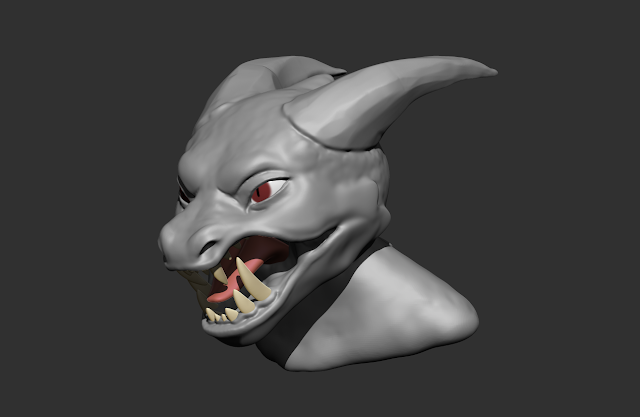
In this ZBrush project, I decided to sculpt the head of a snake-like dragon.


Process

To begin, I imported the Dynamesh_128 sphere from the lightbox. From here, I used the move tool and standard brush to define the basic shape of the face. I then used subtraction booleans to create a separated jaw piece from the initial skull.


I started to flesh out more of the facial features, using new subtools to add the eyes, tongue, and teeth. The Damian Standard brush was useful in drawing sharp lines on the face. The Clay Building tool helped me define wrinkles and eyelids from the mesh. 


I added horns, ears, and a neck to my creature. I later decided to hide the ears, since their roundness did not fit the sharper shape language I was going for.


Finally, I used the Clay Tubes and smoothing brushes to etch a scaly texture onto the creature. I also used the Polypainting tool to draw the irises onto the eyes and add color to the tongue and teeth of the model.


Extra

Once the head of the creature was done, I decided to go farther and start blocking out its body. This is still a work in progress.


Here are the references I am following for the musculature:


Thursday, September 7, 2023

Use of Silhouettes

 For this project, I practiced creating identifiable silhouettes of the character Samus. 

Process

I used Eric Wiley's Basic Shapes assignment as a reference for Samus.


I followed the basic shapes shown in this character chart, and built off of them from there. Samus is made of a lot of circular and pointy shapes.

These are the other references I used:


Monday, September 4, 2023

Minecraft Level

 
For this project, I created a simple Minecraft-like setting with transparent grass. I learned how to work with materials and building textures for models in both Maya and Unreal.


Process Images

First, I created a simple beveled cube in Maya. (Picture taken after texture was added.)

I used the cut and sew tool to organize the cube's UVs into a cleaner grid. 

I created three textures in photoshop: grass blocks, water blocks, and sand blocks. I made sure to import this texture into Maya and flip any backwards UVs.


I imported my blocks and textures into Unreal. I constructed a small scene after applying new materials to different blocks.


I went back into Maya and Photoshop and created a plane model and simple texture to make grass cards.


I created a transparent material for the grass cards. I utilized opacity masks and the alpha channel for this.


I placed the grass cards, adjusted the lighting, and then the scene was ready to go!


Portfolio 3 - P.4

For this project, I am creating a bust of this character made by Oscar Vega! You can find his Artstation at  this link here. Reference Board...