For this project, I practiced 3-point lighting and outdoor scenery lighting in Unreal. I used a creature model that I created for another class, and placed it in an environment to match it.
Here are my renders:


For this project, I practiced 3-point lighting and outdoor scenery lighting in Unreal. I used a creature model that I created for another class, and placed it in an environment to match it.
Here are my renders:
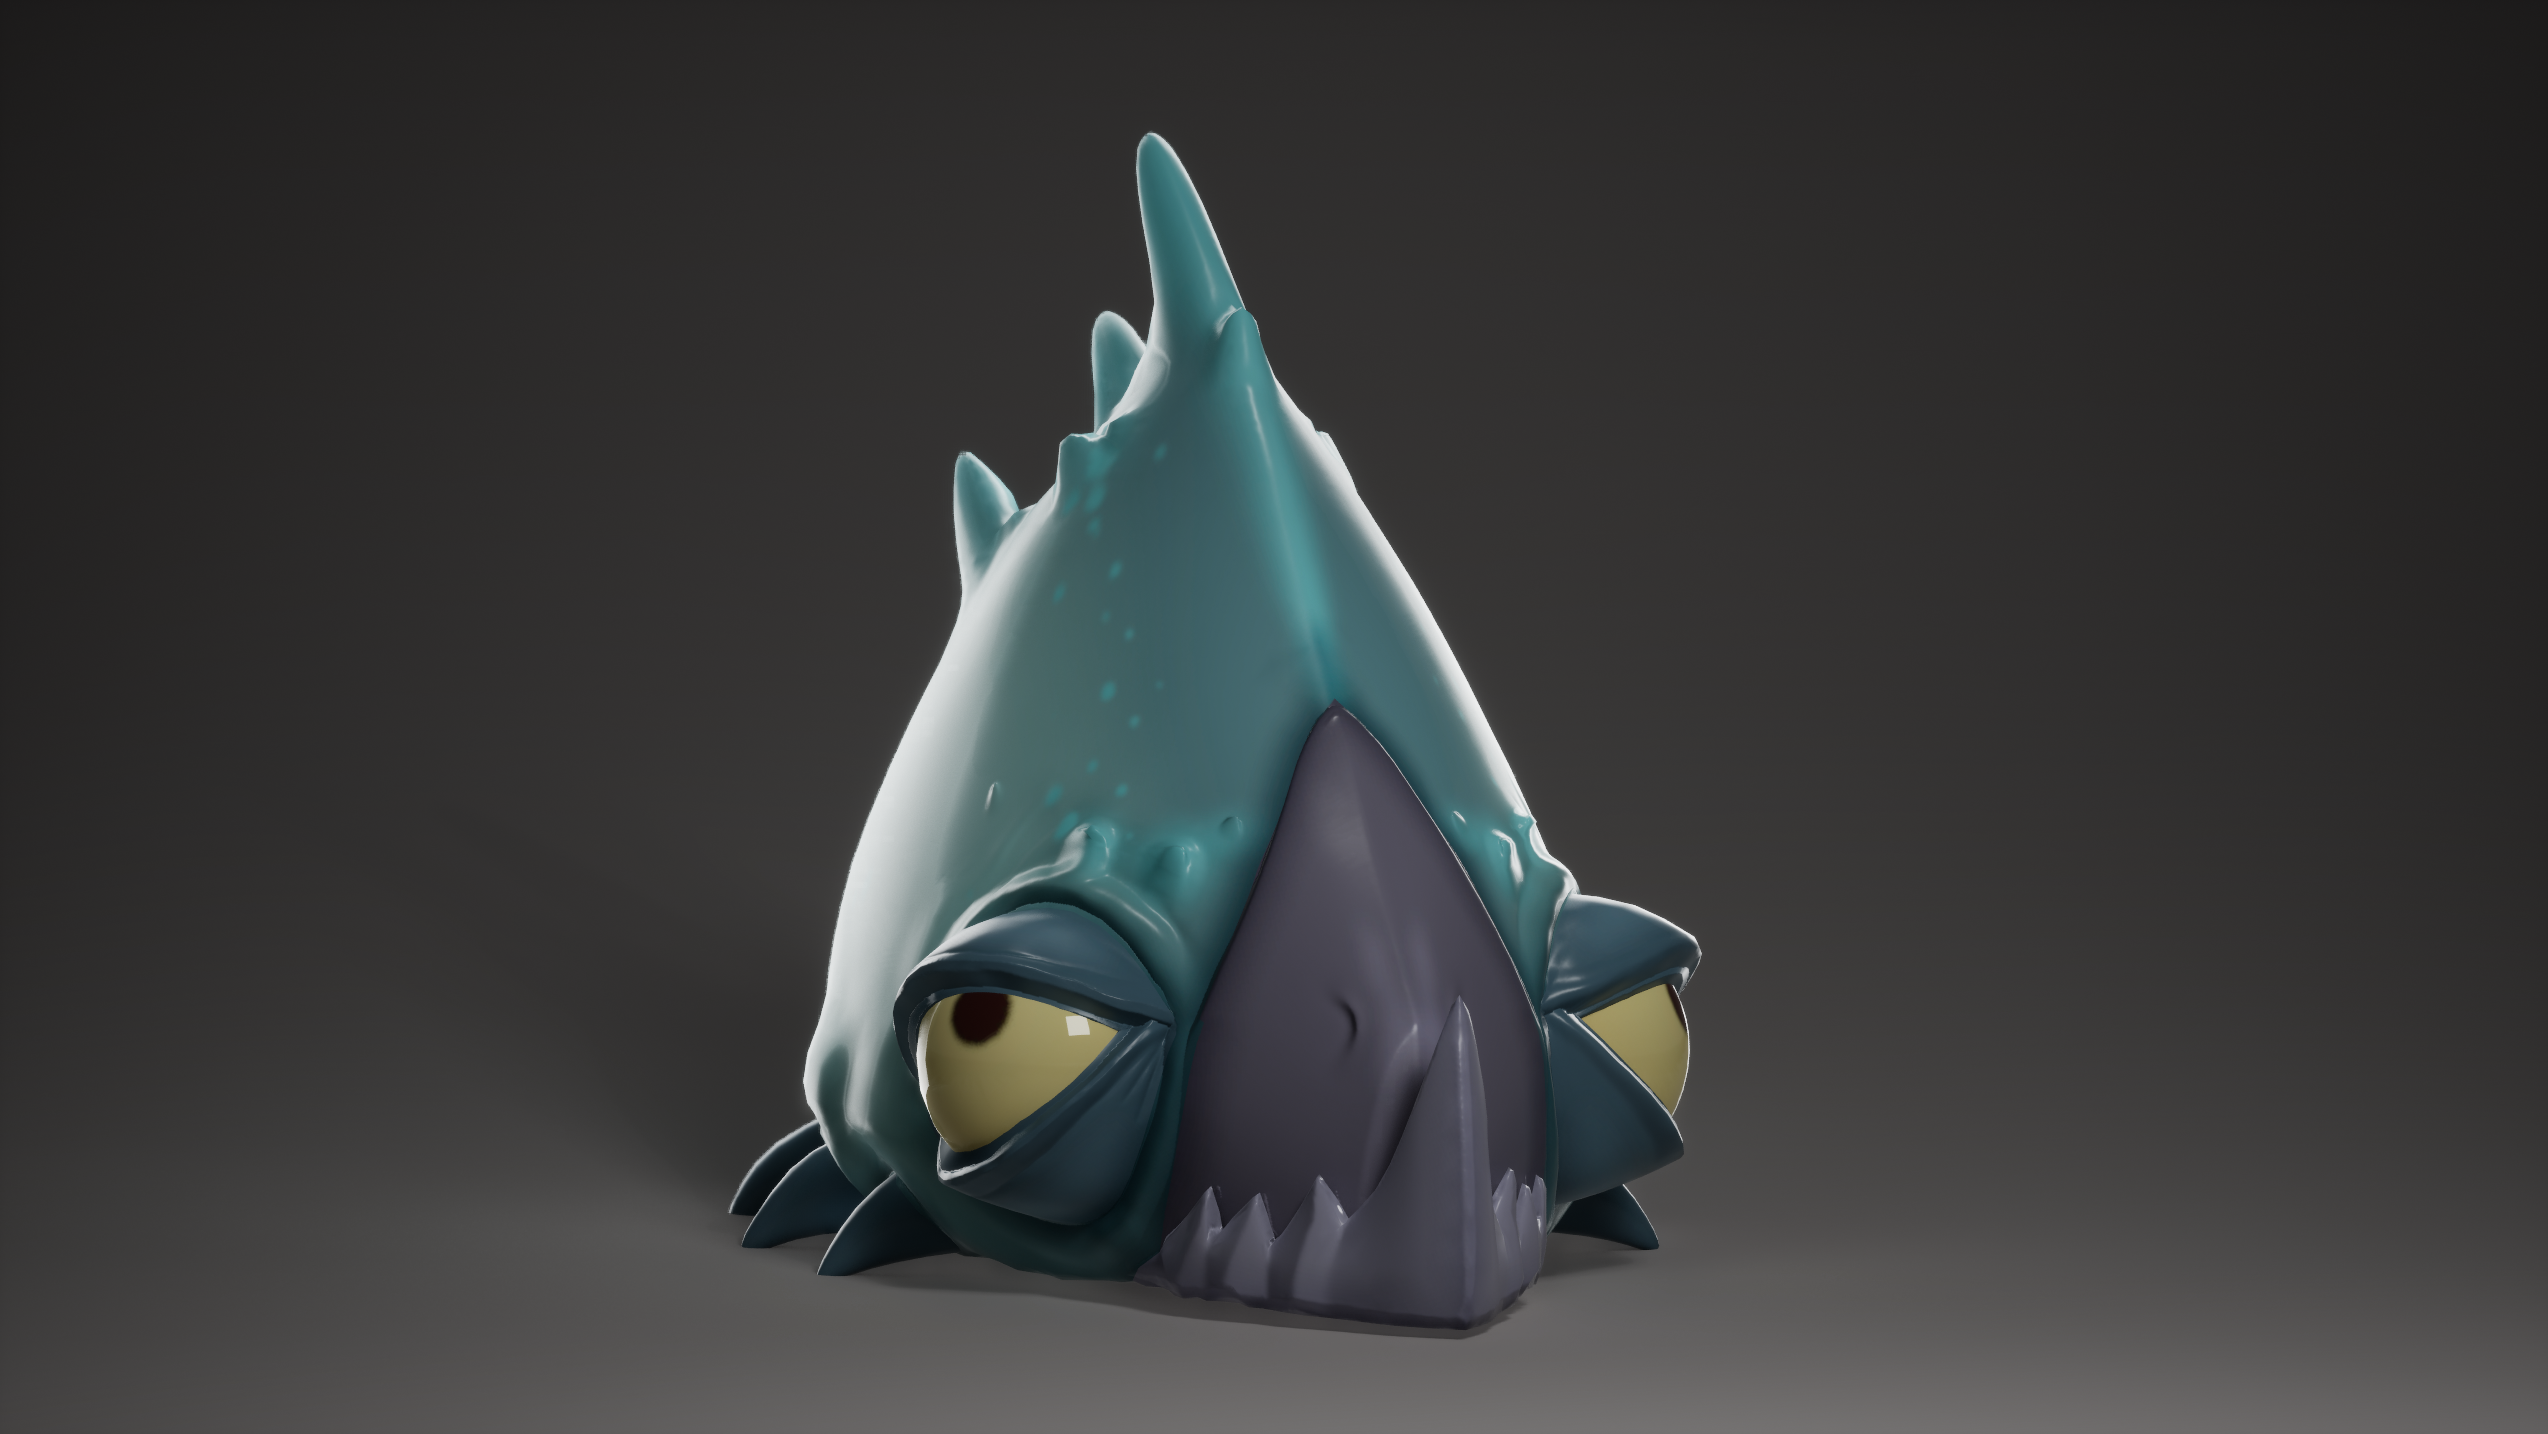
For this project, I am focusing on character modeling. I am modeling a creature created by CreatureBox.
Here is the concept I am working from:

First, I made a low-poly proxy model in Maya, smoothed it, and then I imported it into ZBrush. Here is a ZBrush render of the non-smoothed proxy:


After that, I subdivided my model and lined it up with the reference image with the spotlight tool. I extracted the extra spikes using masks and the move tool.
Here is the reference set up in ZBrush:

Here is the render of the final blockout:


For this project, I am focusing on character modeling. I am modeling a creature created by CreatureBox.
Here is the concept I am working from:
First, I made a low-poly proxy model in Maya, smoothed it, and then I imported it into ZBrush. Here is a ZBrush render of the non-smoothed proxy:
After that, I subdivided my model and lined it up with the reference image with the spotlight tool. I extracted the extra spikes using masks and the move tool.
Here is the reference set up in ZBrush:
Here is the render of the final blockout:


For this project, I practiced setting up a scene using depth of field and meshes provided by Quixel Bridge. I also used an HDRI cubemap while lighting the scene.
Here are my renders:


Artist Roadmap
Projecting Out Past GraduationI made some reference boards for 10 Artists that inspire me. Here they are:
1. Rinotuna

2. Orb


For this project, I am learning the basic concepts for lighting in Unreal. This assignment specifically focused on the 3-point lighting system: Including a main light, a bounce light, and a rim light in your scene.
I created four different shots of two different models, each one showing a render in white light and a render in RGB light. The RGB light identifies the three points of light. Red is the main light, green is the bounce light, and blue is the rim light.
The models I used are provided by ThreeDScans. The model of the woman can be found at this link, and the model of the crab can be found at this link.
Here are my renders:


For this project, I am focusing on character modeling. I am modeling a creature created by CreatureBox.
Here is the concept I am working from:
First, I made a low-poly proxy model in Maya, smoothed it, and then I imported it into ZBrush. Here is a ZBrush render of the non-smoothed proxy:
After that, I subdivided my model and lined it up with the reference image with the spotlight tool. I extracted the extra spikes using masks and the move tool.
Here is the reference set up in ZBrush:
Here is the render of the final blockout:
For my personal project, I aim to practice sculpting the male figure to improve my understanding of anatomy. To begin, I am going to focus on a torso with a muscular build to get a feel for where the muscle structure lies under the skin.
Here is my reference board:

Research Project - Marvelous Designer Basics
During my few semesters here at FIEA, I have been familiarizing myself with many different game art software. One in particular is Marvelous Designer, a cloth simulation program used within the game design industry. Since I am a character artist, this is a program I want to become more comfortable in before I move into the career world. Here, I explore some of the tools I've become familiar with during my learning process

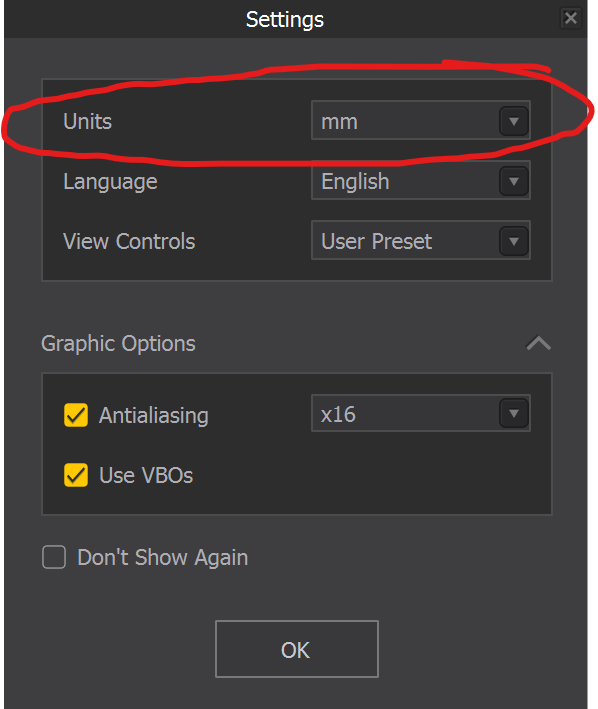
Setup
Scale
Having the correct setup within Marvelous Designer is an underrated first step. In order to get the cloth to simulate the way you want it to, it is important to consider the scale of your model. You can choose the scale of your scene when you first open the program, and you can choose the scale of the model you wish to import.
When working on my second project within Marvelous, I mistakenly set the scene in millimeters, when my character was scaled in meters. This ended up making the model far too large for the project. Any cloth I added had so many polygons within it that the program would run at a snails pace, and send the cloth flying into space.

On the other side of the coin, for my third project in Marvelous, my model imported in far too small a scale. This made any pattern I drew very tiny with few polygons, so the fabric would not fall correctly without glitching out.

Once I went back and fixed the scaling issues, the program ran efficiently and the fabrics finally cooperated! Always consider the scale of the model you are importing, as the units you select during import may not always match each other. You may have to play around with the metrics to get that Goldilocks "just right" scale.
Camera Controls
Working between multiple programs can be quite confusing, since they often come with different camera control hotkeys. If you're like me and try to stick with the same muscle-memory controls to work more efficiently, you can go to the top toolbar, click Settings/Preferences > Preferences > View Controls, and then switch up the movement controls (along with other settings) to your liking! I like to match my controls to Maya's defaults.


Tools
There are countless tools you can use in Marvelous' toolbox. Here are some of the tools I used the most:
THE 2D TOOLBAR
The 2D workspace, on the righthand side of the default layout, is where you will draw your sewing patterns (2D shapes, similar to UVs) of the clothes you want to make!

Draw Polygon
Pretty straightforward in its name. This set of tools allow you to create the shapes of your clothes, similar to drawing sewing patterns. You can draw free-hand, or pick a type of shape to create.

This tool moves whatever patterns you create as whole pieces. It does not change any shapes and simply transports them around the 2D space.

Edit Pattern
Each shape is made with vertices and lines that you can alter to your liking. The edit pattern tools include:
- Basic Edit Pattern: Use this to alter individual vertices or lines instead of the whole shape.
- Edit Curvature/Edit Curvature/Smooth Curve: Use these to round out the edges of your patterns, as well as edit the curves to your liking.
- Add point/Split Line: Adds vertices to your pattern and split a line into segments.
- Slash and Spread: Cuts a line into your pattern and rotates a portion of it to your desired angle.
- Trace: Traces a pattern while creating a new shape.


This tool allows you to draw shapes inside a pattern.

Sewing patterns connects them together within the simulation. The different tools in this set include:
- Edit sewing: Move or delete sewing that you have made.
- Segment sewing: Sews the edges/lines of a shape together
- M:N Segment sewing: Sews multiple segments at once.
- Free sewing: Sews vertices together.
- M:N Free sewing: Sews multiple vertices at once.
- Check sewing length: Checks the length of the segments that are sewn together. Useful for making patterns clean without any pinching at the seams.


THE 3D TOOLBAR
The 3D workspace, on the left hand side of the screen in the default layout, is where you will work with and simulate your cloth patterns in real-time around your model.

Simulate
This tool toggles cloth simulation on and off. You can choose different processing powers for your simulation. The more fitting the simulation, the slower it will be, and vise versa. You can push and pull the cloth around during the simulation as well!


This tool allows you to move pieces of your pattern in the 3D space. It's important to line your pieces up around your model, so that when simulated, the cloth will fall on it properly.


THE LIBRARY
The library in Marvelous is full of wonderful presents for fabrics, patterns, and more! It's a great help for getting started and taking a peek into how others make patterns in the program.

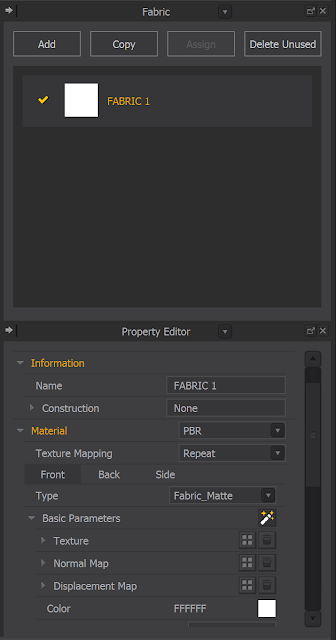
THE PROPERTY EDITOR
This is where you edit the properties of the fabrics you use and the shapes you create. 3D Megaverse has a great video on YouTube exploring some of the parameters within this editor, including this chart that he made to sum up fabric properties:

Tips for Success
Referencing
Real life is the best resource for simulations. Looking up sewing patterns for different types of clothes will help guide you in creating the shapes you want!


Lots of artists post the process and screenshots of their work within Marvelous. There are so many resources to choose from, and these references will be a huge help in the long run! (Just make sure to give credit where credit is due!)
Researching
Researching the type of clothes you want to make, including your references you find, is key to getting the right fabric properties as well.
If you are looking to create a garment from a particular time period, consider the fabric it was made of back then. How thick is the fabric? How did the models wear it? Where would the seams lie on the body?
There are many wonderful tutorials to help you get started within the program, so don't be afraid to Google something if you get stuck. There are plenty of artists out there to learn from!
In Conclusion
Marvelous can be a difficult program to learn, but as you get to know it, it becomes a fun way to develop your characters and fashion. I aim to continue practicing this program and exploring new ways of working within it as I continue on my character art journey!


If you're getting started with this program, I highly recommend:
- Start with simple clothing patterns and simple human models! Starting small helps to avoid overwhelming yourself with the different tools and any glitches with the models or fabric you may come across.
- Trial and error is okay. If something doesn't work right away, don't be afraid to redraw any shapes and try new patterns!
- Be patient with yourself. New programs take time to learn, especially ones as complex as Marvelous. Don't let yourself get discouraged if your first project doesn't work out the way you want it to- you will get better with practice!
Thank you for reading, and happy sewing!
For this project, I am creating a bust of this character made by Oscar Vega! You can find his Artstation at this link here. Reference Board...